|
A Look into the Play with Clay:
A Ceramics Webquest Ceramics Processes |
 Webquest Introduction |
 Ceramics Terminology |
 Ceramics Processes |
 Ceramics History |
 Ceramics Forms |
 Task Rubric |

|
A Look into the Play with Clay:
A Ceramics Webquest Ceramics Processes |
 Webquest Introduction |
 Ceramics Terminology |
 Ceramics Processes |
 Ceramics History |
 Ceramics Forms |
 Task Rubric |
Even though there are endless possibilties on what form the clay could take in ceramics, there is a process that all ceramic forms must go through. Whether a ceramic mug is created in a facory by machines or in a rural village by hand and fire pit, the clay must go through an evaporative process that makes the clay harder, stronger and able to suport its own weight. Below is an overview of this process. Of coarse there are exceptions, for instance not all ceremic forms are fired or glazed, but they majority are and for this class we will stick to the below basic steps.
Clay is the main substrate used to create ceramics. Ceramics is a very broad catagory which includes a wide variety of pottery and sculptural forms. After the ceramic form is made, it is baked in a kiln to make it hard and durable. The form can also be painted on with glaze to make it waterproof and for decoration. A form can be built by wheel-throwing, hand-buliding, or slab-rolling the clay.
In the building of the form, the clay goes through a process of drying out. Greenware refers to any pottery that hasn't been fired, and there are three stages of greenware: (1) greenware in its original, very maluable and moist stage - this is when the basic form is constructed; (2) greenware in the leather hard stage - this is when the joining of additional clay pieces are added or relief impressions are made into the clay surface; and (3) greenware in the bone dry stage - this is completely hardened clay that is ready to be fired. The first firing of the form is called the bisque firing and afterwards the form is ready to be glazed with underglaze and/or overglaze and fired a second time. Another way to paint the form is to paint a thin coat of different colored slip on the surface and use the sgraffito method to allow the first surface to show through.
Joining is done in two ways. The first is done by pinching of the two surfaces together by fingers and works best in the spiraling of the coil method. The second is done by using scoring and slip, which gouges out clay where the joining will occur and then the gouges are filled with slip to adhere the two surfaces together.
If you are curious to see the process of how a vessel is wheel thrown, check out this illustrated tutorial page.
Here is a page looking at the development, history, and classifications of clay.
Go here to se a picture of some one rolling out an evan slab for the slab building process.
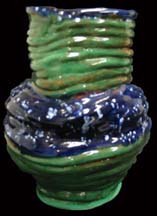
Our class will be exploring two differents type of form building: coil & slab. Coil building is comprised of rolling even coils of clay to lay ontop of one another inorder to make evenly thick walls. Slab building is comprised of using a rolling pin to created evenly thick walls and joining them together. Both building methods are relatively simple and because of this many adaptions and ingunities can used to create beautiful forms. There are three important factors you need to be aware of when first working with clay.
First, you will need to get the feel for the right amount of moisture needed in the clay. When working the moisture will be slowly taken out of the clay by your hand and become hard and crack. Water will have to be added slowly to the form throughout the building process, but if too much is added the form's walls will become too heavy and buckle under its own weight. The correct consistancy can only be found by working with the clay and getting a feel for it.
The second factor is the air pockets that sometimes get trapped in the clay. This is important because if the form is fired in the kiln with an air bubble in it, a piece or the entire form will explode. Wedging the clay is necessary to force the air pockets out. It is important to remember that anything added on to the original wedged clay (like a handle, legs, or decoration) needs to be wedged also.
Lastly, when joining an piece to the outside surface of the form, the scoring & slip method of joining is necessary. If this isn't done, it is likely that the add-on won't stay adhered to the form.