


This wheat bread is tender, delicious, sweet, savory, and very, very time consuming. This whole wheat sandwich bread recipe comes from Cook's Illustrated, also known as America's Test Kitchen. That means this recipe is tried and true by professionals, but the time involved is extraordinary. It can take upwards of 15 hours to make this bread.
No joke.
Luckily, most of that time is waiting, time that can be spent watching TV or walking the dog or sleeping.
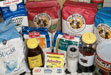
This whole wheat sandwich bread is also one of the more expensive breads to make, but not by much. With ingredients like honey, wheat germ, and whole wheat flour, it costs about fifty cents more per loaf - still, over time, less expensive than buying bread.
Okay. Let's go.
This bread involves three steps: the biga, the soaker, and the dough. The biga is a mixture of water, bread flour, and yeast, which you let rise in a bowl overnight at room temperature. The soaker is wheat flour, milk, and wheat germ, which combines to make a very sticky dough-like substance, which you let sit overnight in the refrigerator. The dough is a combination of the soaker and the biga plus some more yeast, some honey, butter and oil, and salt.
- The Biga:
- 2 cups bread flour
- 1 cup warm (110 degree) water
- 1/4 tsp yeast
- The Soaker:
- 3 cups whole wheat flour (and extra for kneading)
- 2cups milk
- 1/2 cup wheat germ
- The Dough:
- 1/4 cup honey
- 4 tsp salt
- 2tbsp yeast
- 6 tbsp unsalted butter, softened
- 2 tbsp vegetable oil
- the biga
- the soaker
Start off with the biga. Combine the flour, water, and yeast in a medium-sized bowl and mix until you get one cohesive mass. Cover with plastic wrap and put it off to the side. The biga should sit and rise for at least 8 hours but not more than 24 hours.
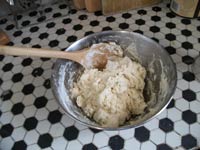
Now the soaker. Mix the flour, milk, and wheat germ together in a big bowl and stir with a wooden spoon til you get a cohesive albeit shaggy mass. Turn it out onto a lightly floured surface and knead for about 3 minutes, until the soaker is smooth but still sticky. Return to the bowl, cover with plastic wrap, and let that sucker sit in the fridge for at least 8 hours but not more than 24.
Now go to bed, go to work, go to school - whatever.
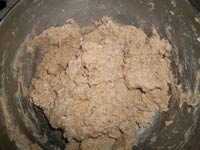
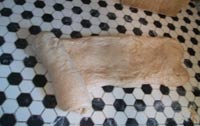
Ready? Okay. You should have a white, holey, fluffy-looking biga, and a soaker that looks exactly the same. Rip the soaker into small, one-inch pieces, and add the biga, the honey, the butter, the oil, the salt, and more yeast. Mix it with a spoon in your bowl - or if you have a mixer, put it in there and mix for 8-10 minutes. If you're doing this by hand, the same applies to you: mix that bread for 8-10 minutes using scraping and pushing motions. Once the new dough is homogonous, turn it onto a lightly floured surface and begin kneading for a little while, until the dough is smooth, not too sticky, and a lovely beige color. While kneading, you should notice a very light texture and almost no resistance; it should feel like pushing and pulling a feather pillow.

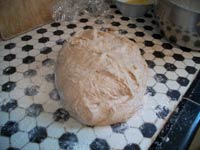
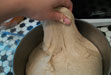
Put the dough in a lightly greased bowl, cover it with plastic wrap, and let it rise for about 45 minutes.
Whew! Look how big that thing got! Deflate it gently by pushing down in the middle with your fingertips. Grasp one side of the dough and fold it to the middle. Rotate the bowl about 90 degrees and do it again, until you have a square-ish piece of dough. Now fold those corners into the middle as well - you should have folded it 8 times. Let it rise again for 45 minutes, or until it's doubled in size.
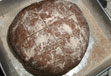
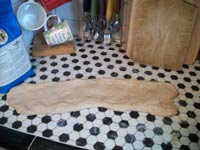
Time to put it in the pan. Turn your dough (which should be pretty big and fluffy by now) out onto a clean, lightly floured surface and divide it into two parts. Shape each half into a rectangle that's about a foot and a half long and about half a foot wide, give or take a few inches. Starting with the short side, roll the dough tightly into a cylinder. Pinch the seam, smoothing it, and place into a greased loaf pan, covered lightly with plastic wrap.
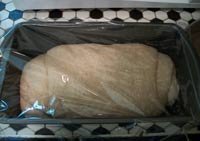
This is the final rise, and should go until the dough has doubled in size, about one inch over the top of the loaf pan. Patience is required here. I've made this bread a few times - the first time I was hasty and rushed the rising process. The result was flat, dense bread. Give this bread the time it needs. When it's ready, cut a slit using a serrated knife or razor blade down the center.
You're almost there! Arrange your oven racks so that they're at the lowest possible and medium slots. Preheat the oven to 400 degrees.
Once the oven has reached the 400 degree mark, boil two cups of water on a stovetop and place in a pan (while the water is still boiling!) on the lowest possible rack in your oven. Place the unwrapped loaf pans on the middle rack, on a baking stone if you have it, and lower the temperature of the oven to 350 degrees. Your oven should look like this:
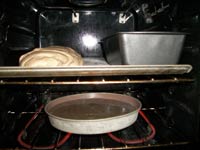
Bake for about 45 minutes, rotating the pans from front to back and side to side at 15 minute intervals.
It took awhile, but you're on the home stretch now. Breathe in the sweet, wholesome smell of the bread as it bakes.
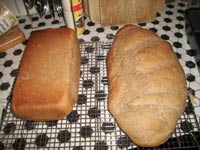
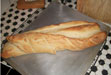
When your bread's done, place the loaf pans on a cooling rack for about five minutes, then take the loaves out of the pans and place back onto the cooling rack. They should be a beautiful golden-brown color, be slightly hard but give in to a wonderfully soft and fluffy interior. Congratulate yourself, my friend. It has been a long, hard journey. Eat and enjoy.