


Proofing
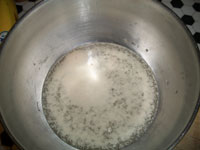
How can you tell if your yeast is still good? Still up to the challenge of eating sugar and producing carbon dioxide? There is a way: proofing. This is a simple test which involves warm water, a little bit of dissolved sugar (whether that sugar is honey or granular sugar), and the yeast. Dissolve the sugar into the water, let the yeast float on top, and wait for about ten minutes or so until the yeast has turned bubbly and creamy-looking, like so:
Folding
This video from Wild Yeast Susan will show you the proper folding technique. Folding helps avoid excessive kneading and helps the gluten stretch.
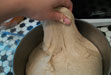
Kneading
Here is a truly excellent video which I did not make but wish I did. This comes from Epicurious.com, a great website for chefs and bakers of every skill level. The video demonsrates the correct kneading technique.
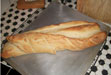
The Pan of Boiling Water at the Bottom of the Oven
Two of the recipes I use here call for a pan of boiling water at the bottom of your oven. It's a curious practice that originated in Europe, where the ovens are built with steam-valves. The ideal baking environment for crusty breads has a lot of steam early on in the baking and a hot dry oven towards the end. The exposure to water during baking keeps the surface of the dough from gelatinizing too soon and the dry heat gives the crust that nice golden color and crunch. The result is a cripsy, not-too-thick crust and a soft, delicious inside.
Another way to introduce steam into the oven is to use a squirt bottle. At the beginning of the baking, squirt the inside of the oven liberally: the walls, the bottom, the inside of the door, and the loaves. This is more direct contact and has a more localized effect - that is, if you squirt in one area more than another, your crust will be unevenly browned. Probably it's best to be safe and use both methods.