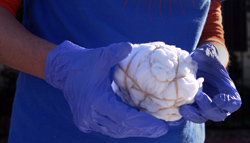
 The marbled design is the easiest to create, which makes it ideal for beginners. To make a marbled T-shirt, simply scrunch the shirt into a ball and secure it with plenty of rubber bands going in all directions.
The folds from scrunching and the criss-cross pattern created by the rubber bands are what help create the design. Put up to as many rubber bands as you desire on the shirt, but I would suggest no less than 10.
 An important thing to remember when making a marbled shirt is that the dye has to soak through a lot of fabric to reach the middle of the T-shirt. You must squirt the dye inside the ball of fabric if you want the design to be all over the shirt.
If you only squirt dye on the outside, there will be a lot of white space on your T-shirt, and your shirt will look more stained than tie-dyed.
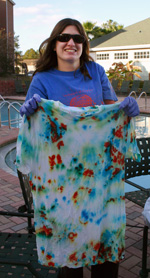
Since the marbled design has so many layers of fabric, it lends itself very well to using multiple colors. Jo only used orange and blue in her design, however, it is quite possible to have a successful shirt with four or more colors.
Jo's shirt shows the marbled design pretty well, but she could have put more ink in the bottom right and upper left regions of her shirt to give the pattern a more all-over effect.