How to create a sample graph at Create A Graph and insert it into a Word document:
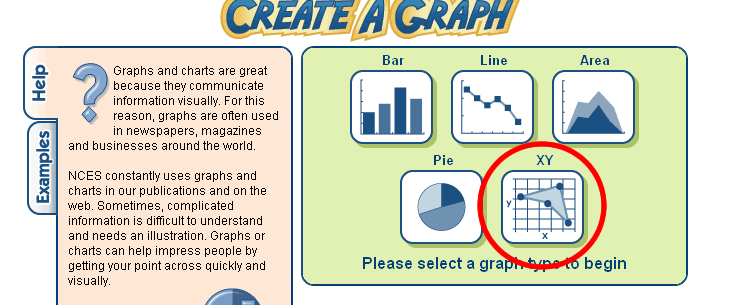
For the graph type select "XY"
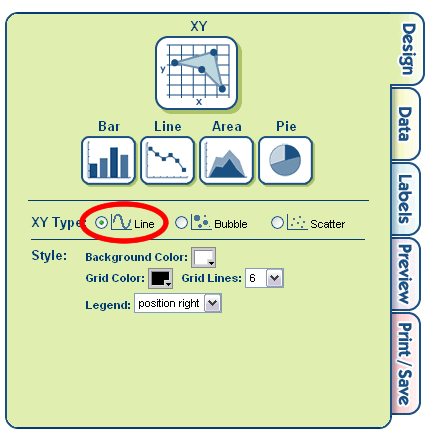
On the "Design" tab choose "Line"
On the "Data" tab fill in appropriate titles graph title, axis labels and source. Fill in the data values from your table. Give the runner's name for the "Group Label" and choose a shape for the point. See the picture below as an example. You can play with whatever colors you like.
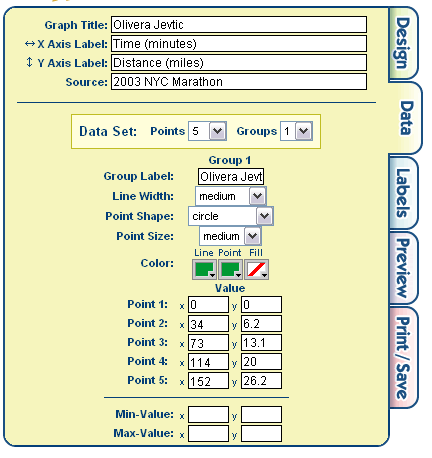
Remember: the picture below shows where your data came from for this graph.

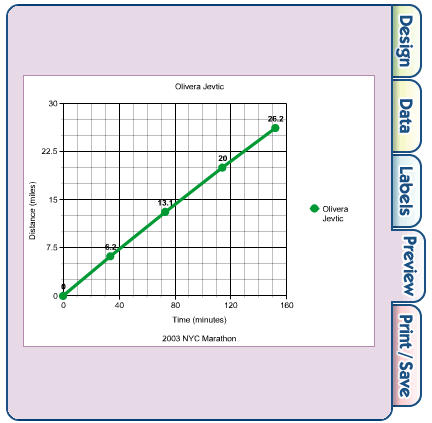
You can skip the "Labels" tab and go straight to "Preview" to see your graph:
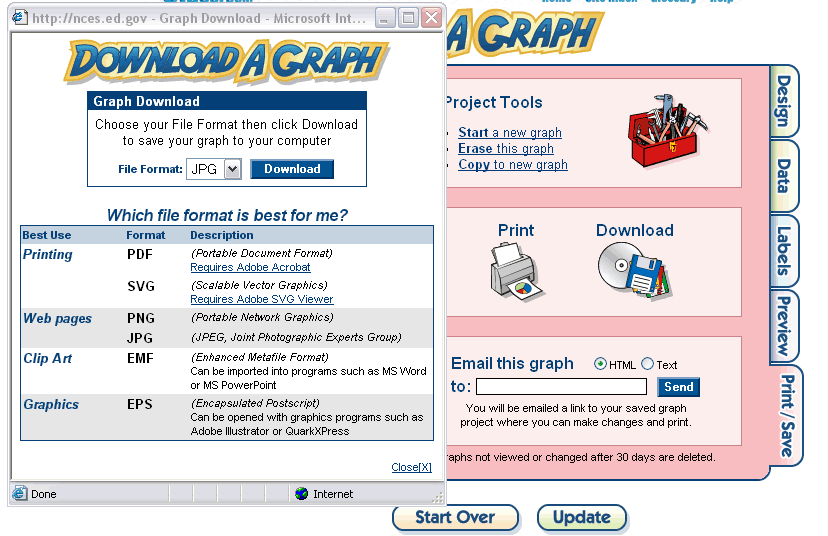
Feel free to go back and change the look of your graph. When you are finished, click on the "Print/Save" tab to save your graph. Click on "Download" and in the pop-up window select "JPG" from the dropdown menu and then click "Download". Give your graph an appropriate filename and then save your graph to your hard drive at a place you will remember where it is.
To insert your graph into your word document follow the steps below:
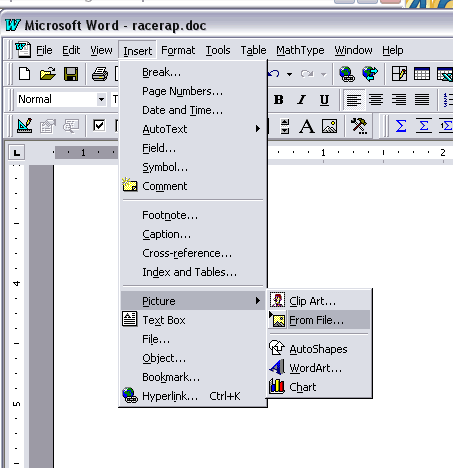
On the menu at the top of Word go to "Insert">"Picture">"From File". Browse to find your graph and then click "OK" to insert it into your document. Once your graph is in the document you can click on it and drag the corners to resize it. Holding the "Shift" key while you click and drag a corner will maintain the proportions of the graph.
Now you have your graph in your word document!